What Is Kodular?
Kodular is a online software which allows us to make android apps without any programming knowledge. Kodular's enable us to make fantastic android apps using their blocks-type editor.We can make our apps stand out with the material design UI.
Using Kodular we can make android apps just by dragging and dropping components provided in Kodular Creator.We also need not to write any code to make our app working. We just have to specify blocks in kodular creator and we are out of the tension to write Codes.
Getting Started With Kodular :
For making apps you just need to go to Kodular's Creator and sign up there with your email and activate your account.You can create Kodular account and make apps for free. There aren't any charges to use Kodular Creator. So just go Kodular.io and sign up there and start happy coding and app making.
Kodular Dashboard:
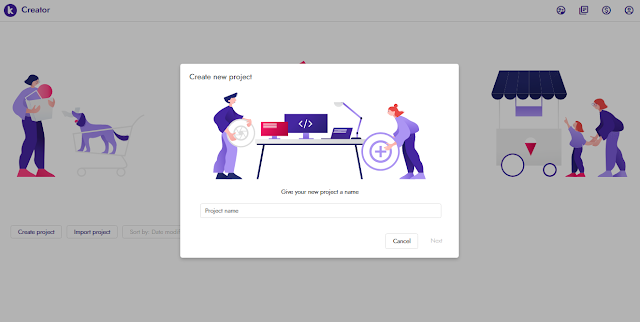
After you have signed up for Kodular creator,select the option "Create Apps" and you will be redirected to page shown in above image.This is the project area for your account.All your project can be found here,you can create,edit and delete your projects from here. When you first visit this page you don't have any project onboard. So,you just have to click "Create Project" and you will be shown a dialog box as given below,

Here, you will be asked to type your new project name. So you just have to type your project name(Note: It is not application name,it is just the name given to specify your project).After typing your project name you will see the "Next" button is enabled.Click on the button and you will see another dialog box,
In this dialog box you will be asked choose the basic properties and package name for your android app.You just choose your theme,colors and type package name for your project. After filling all the fields as per your requirements,click on the "Finish" Button and you are all done. You have created your project successfully.
It will take some loading and you will be automatically redirected to your working area.
It is the place where you will design and construct your app.There are so many options in this page but the main you will be working on are :
1. Palette (On left side):
It is the place where you will find the components which you will be using during making of your app.From here you will get the visible components and non-visible components which you will use to design the UI and the background of your application.
2. Viewer (In Center):
It is the preview for the components you will drag to design the UI of your application.You can see the visible components here when it is set default. But please keep in mind it is not the actual preview for your app. The actual view of app may differ from what you have designed in the preview because of the change in the aspect ratio,size and resolution of your testing device. So,here Kodular provides you to connect a realtime testing device to see the changes happening in your app, for checking realtime changes you have to download and install a application from play store Named "Kodular Companion".We will talk more about companion later.
3. Components Properties Palette:
On the left side you will be able to see the component or application properties.This is the area from you can change the size,color and many other properties of any component.For changing properties of any components just click on the component in the "All components palette" given on the left side of the properties.
Blocks or Coding area:
When you click on the blocks button you will see the blocks editing area on your screen:
In on this page you can edit the working and codes for your app. Here you can specify blocks by dragging and dropping in the viewer area.You can also see all the components of your app on the left side with some other options such as colors,lists,text etc. which we will use during working on our project.When we click on a component we can see blocks related to component like:
From here we can drag and drop a blocks and specify action or check any situation to initiate any action in our application.
This was a overview of the main working in Kodular Creator.We will learn more and advanced application development using Kodular Creator in our Kodular Series.
Thank you for reading. You can ask any query related to Kodular Creator in comments we will try to respond as sooner as we can.
Happy Coding...........


Comments
Post a Comment